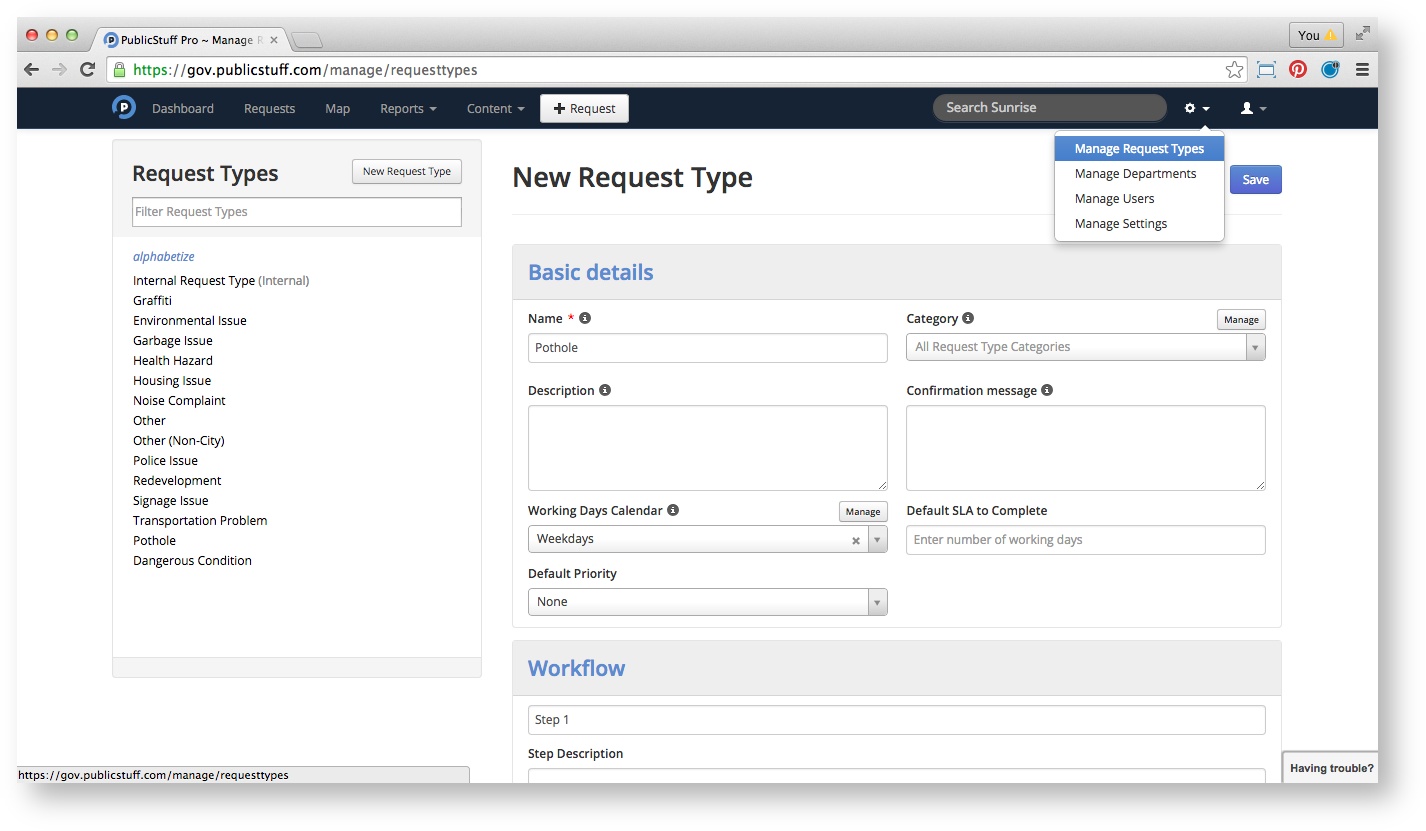
Basic Request Type Setup
Request types are set up under Settings > Manage Request Types
PublicStuff recommends the following minimum settings for each request type:
Request Display
Category: Categories are a collection of request types and act as a folder for request types. PublicStuff recommends using categories if you plan to have 15 or more request types because the list of request types can be cumbersome to scroll through for users. A common request category is Streets, in which all streets related service requests (i.e. broken sidewalk, curb cut, or potholes) are grouped.
Name*: Name of the request type, e .g., Pothole Repair, Abandoned Property.
Description: Enter a short description that will be displayed beneath the Request Type Name. For example, Abandoned Automobile could have the description “Vehicle must be parked on a city street with expired registration, appears to be undriveable, and/or has not been moved for one week.”
Confirmation: Enter a short confirmation message to be shown in a pop-up on the iframe and mobile apps after the request has been successfully submitted, and in the confirmation email sent to the user. For example, “Thank you for your submission. The estimated response time to this issue is 7 business days. If this is an emergency, please call 911.”
Display this request type to the public?: Check this if the request should be available for public reporting (all request types that are not internal). Uncheck this option if you have internal-only requests, or are testing a new service request not yet ready to be released to the public.
Data Collection
Address Requirements: Set whether the request address field should be Required, Optional, or Disabled. Most requests will require an address. Some examples that don’t require an address are requests for public information or requests for forms, e.g., a building permit.
Customer-Entered Description: A free-form description field is included with each request type by default.
Custom Fields: This field enables you to collect additional information related to the request. There is no limit for the number of custom fields you create, but PublicStuff recommends adding only as many as you think residents will reliably complete. Custom fields are optional but helpful when collecting important information up front. To lear how to create these fields view Setting Up Custom Fields.
Request Privacy
Mark all submitted requests of this type Private?: Check this if all requests of this type should be marked as private and invisible to the public. Examples of when you might check this include a new water meter hookup request, police requests, or another type of request that contains sensitive information.
Mark all requests of this type Sensitive?: This provides an additional layer of privacy for staff visibility. Only the current assignee, Administrators, departments, and/or staff specifically designated to this type will be able to View/Edit requests of this type. Any other users outside of that group will not be permitted to View/Edit requests of this type. Police tips and comments about government staff are examples of when making requests sensitive can be helpful to municipalities. Most requests, however, will not be sensitive.
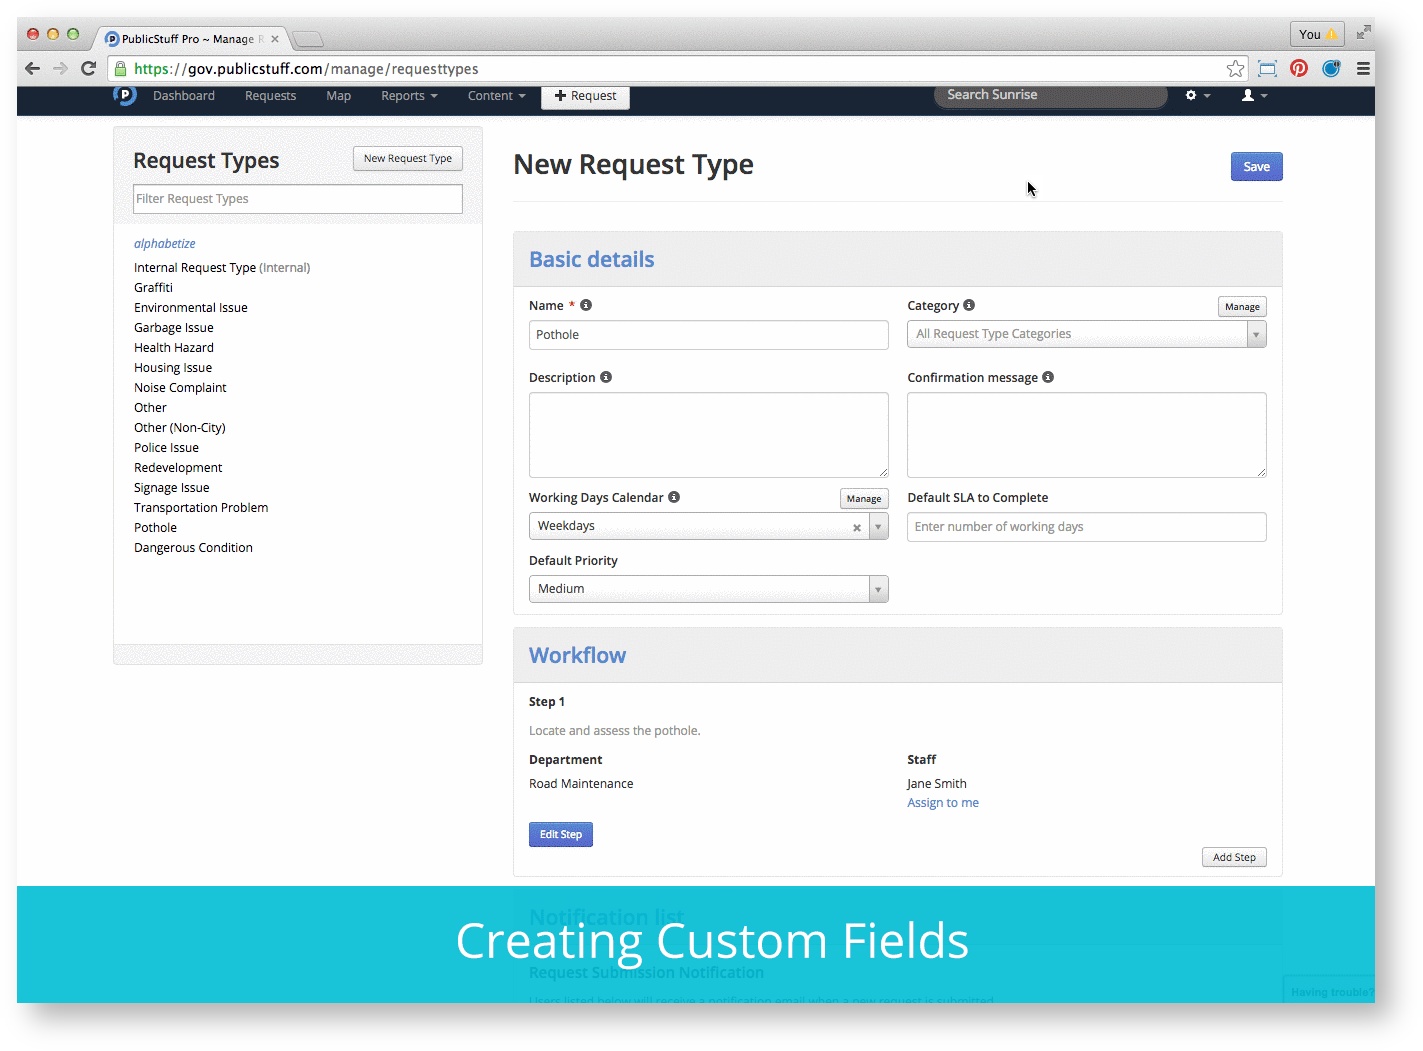
Staff Workflow
Default Duration: Enter the number of days it will take to fulfill this request as per the municipality’s service level agreements (SLAs). This number will determine when requests are marked as overdue in the system.
Blackout Calendar: This calendar automatically calculates the type’s due date by taking into account unworkable days. For example, if the default duration is three (3) days, and the blackout calendar is set to Weekends, a request submitted on a Friday would be due Wednesday.
Under the Workflow: From the dropdown box, choose the department that will be assigned to the request and the staff member from that department that will receive all requests of this type. You can add as many steps as necessary in the workflow, and you can even add the same person to the workflow multiple times.
Example: A request is received by Angela Price in Department of Fire and Life Safety Services. Angela reviews the information from the resident and then assigns the request to Bryan Rockford in the Police Department. Bryan completes his step and reassigns to Angela to respond to the resident and close out the ticket. While the request moves through the workflow and departments, ‘ownership’ is attributed to the department assigned to the request at the first step in a workflow.
A workflow Title and Description can also be added to indicate to a user the tasks needed to complete the step. WARNING: Do not use the description as a notes field for individual requests.
.PNG?version=1&modificationDate=1422896921220&cacheVersion=1&api=v2&effects=drop-shadow&width=211&height=250)
In the Notification List, you may also select individuals to be notified each time this particular request has been submitted. For example, a department manager may want to receive an email notification each time this type of request is submitted. The request won’t be assigned to people on this list; they will only receive an email notification about the request when the request is initially submitted.
.PNG?version=1&modificationDate=1422896940152&cacheVersion=1&api=v2&effects=drop-shadow&width=521&height=250)